

Welcome To Clean Kingdom!
Welcome To Clean Kingdom Cleaning Service!

At Clean Kingdom, we understand the importance of having a clean and tidy space. Whether it's your home or office, maintaining cleanliness is essential for creating a healthy and inviting environment. We are a professional cleaning service that takes pride in providing top-notch cleaning solutions to our valued customers.
With years of experience in the industry, we have built a reputation for delivering exceptional cleaning services that meet and exceed our customers' expectations. Our team of dedicated and skilled professionals is committed to transforming your space into a sparkling clean haven.
Home Cleaning:
Your home is your sanctuary, and we believe it should be clean and comfortable. Our home cleaning services cater to your specific needs, offering regular cleaning schedules or one-time deep cleaning sessions. From dusting and vacuuming to mopping and sanitizing, our meticulous team will leave no corner untouched, ensuring a fresh and inviting atmosphere for you and your family.
Moving Cleaning:
Moving can be overwhelming, with a seemingly endless to-do list. Let us take care of the cleaning process for you. Our moving cleaning services are designed to assist you during this hectic time. We'll thoroughly clean your old place, ensuring it's spotless for the next occupants, as well as clean your new space, so you can settle in without any worries.
Deep Cleaning:
Sometimes, your space needs a little extra attention. Our deep cleaning services are perfect for those times when you want a comprehensive and thorough cleaning. We go beyond the surface, tackling hard-to-reach areas and providing a detailed cleaning experience. From scrubbing grout lines to disinfecting high-touch surfaces, we'll revitalize your space and leave it looking and feeling refreshed.
Commercial Cleaning:
A clean and organized workplace is essential for productivity and employee satisfaction. Our commercial cleaning services are tailored to meet the unique needs of your business. Whether you require daily, weekly, or monthly cleaning, we will work around your schedule to ensure minimal disruption to your operations. From office spaces to retail establishments, we have the expertise to deliver outstanding results.
At Clean Kingdom, we prioritize customer satisfaction above all else. We use industry-leading cleaning techniques and environmentally friendly products to ensure both exceptional results and a safe environment for you and your loved ones. Our team is fully trained, insured, and equipped with the necessary tools to tackle any cleaning challenge.
We take pride in our attention to detail, reliability, and professionalism. When you choose Clean Kingdom, you can rest assured that your space will be left sparkling clean and fresh. We value your trust and are committed to building long-lasting relationships with our clients.
Contact us today at https://www.cleankingdom.us/get-a-quote or call 442-245-7879

How To Dust Surfaces
Clean Kingdom - How To Dust Surfaces

Dusting surfaces is an essential part of home cleaning. It helps to remove the build-up of dirt, allergens, and other particles that can accumulate on surfaces over time. Dusting also helps to maintain the appearance of furniture and other surfaces, keeping them looking clean and new for longer. In this blog post, we will discuss some tips on how to dust surfaces effectively.
1. Gather your supplies
Before you begin dusting, you should gather your supplies. You will need a duster, a microfiber cloth, or a vacuum cleaner with a dusting attachment. You may also want to wear a mask to avoid inhaling dust particles.
2. Start from the top
When dusting a room, start from the top and work your way down. This will prevent dust from settling on surfaces that you have already cleaned. Begin by dusting the ceiling and light fixtures, then move on to the tops of cabinets and bookshelves.
3. Dust furniture
Next, dust the furniture in the room. Use a duster or microfiber cloth to remove dust from tables, desks, chairs, and other surfaces. Be sure to dust both the top and bottom of surfaces, as well as any crevices or corners where dust may accumulate.
4. Dust electronics
Electronics such as televisions, computers, and speakers can accumulate a lot of dust. Use a microfiber cloth or a vacuum cleaner with a dusting attachment to remove dust from these items. Be gentle when dusting electronics to avoid damaging them.
5. Don't forget the floors
Finally, don't forget to dust the floors. Dust and debris can accumulate on the floor, especially in corners and under furniture. Use a microfiber mop or a vacuum cleaner to remove dust from the floors.
6. Clean your tools
After you have finished dusting, be sure to clean your tools. Wash microfiber cloths and dusters in hot water with a mild detergent, and empty the dustbin of your vacuum cleaner.
In conclusion, dusting surfaces is an important part of home cleaning. By following these tips, you can effectively remove dust and maintain the appearance of your furniture and other surfaces. Remember to start from the top, work your way down, and clean your tools when you are finished.

How To Clean The Walls
Clean Kingdom - How To Clean The Walls

Cleaning the walls may not be the most enjoyable task, but it is an important part of keeping your home or office looking its best. Over time, walls can accumulate grime, dirt, and other unsightly marks, which can be challenging to remove. However, with the right tools and techniques, you can effectively clean your walls and restore them to their original condition. In this blog, we will provide you with some useful tips on how to clean the walls.
1. Dust the walls
Before you start cleaning the walls, it is essential to remove any dust or cobwebs that may have accumulated. You can use a soft-bristled brush or a clean microfiber cloth to remove the dust gently. Make sure to dust the walls from top to bottom, so the dust falls downwards and not upwards.
2. Test the cleaning solution
Before you start cleaning the walls, it is important to test the cleaning solution on a small, inconspicuous area to make sure it does not damage the paint or wallpaper. You can use a mixture of warm water and mild dish soap or a specialized wall cleaner for this purpose.
3. Use a sponge or soft cloth
When cleaning the walls, it is essential to use a soft sponge or cloth, as abrasive materials can scratch the surface of the wall. Wet the sponge or cloth with the cleaning solution and wring out any excess water to avoid damaging the wall.
4. Clean the walls from top to bottom
Start cleaning the walls from the top and work your way down, as this will prevent streaks and drips from forming on the lower part of the wall. Make sure to rinse your sponge or cloth frequently and change the cleaning solution if it becomes too dirty.
5. Focus on tough stains
For tough stains such as grease or crayon marks, you may need to use a stronger cleaning solution or a specialized cleaner. You can also use a magic eraser, which can effectively remove scuff marks and other stubborn stains without damaging the wall.
6. Dry the walls
After cleaning the walls, it is essential to dry them thoroughly to prevent water damage or the growth of mold and mildew. You can use a clean, dry cloth or a squeegee to remove any excess water from the wall.
In conclusion, cleaning the walls is an essential part of maintaining a clean and healthy home or office environment. By following these tips, you can effectively clean your walls and restore them to their original condition. Remember to test the cleaning solution on a small, inconspicuous area before cleaning the entire wall, and use a soft sponge or cloth to avoid damaging the surface.
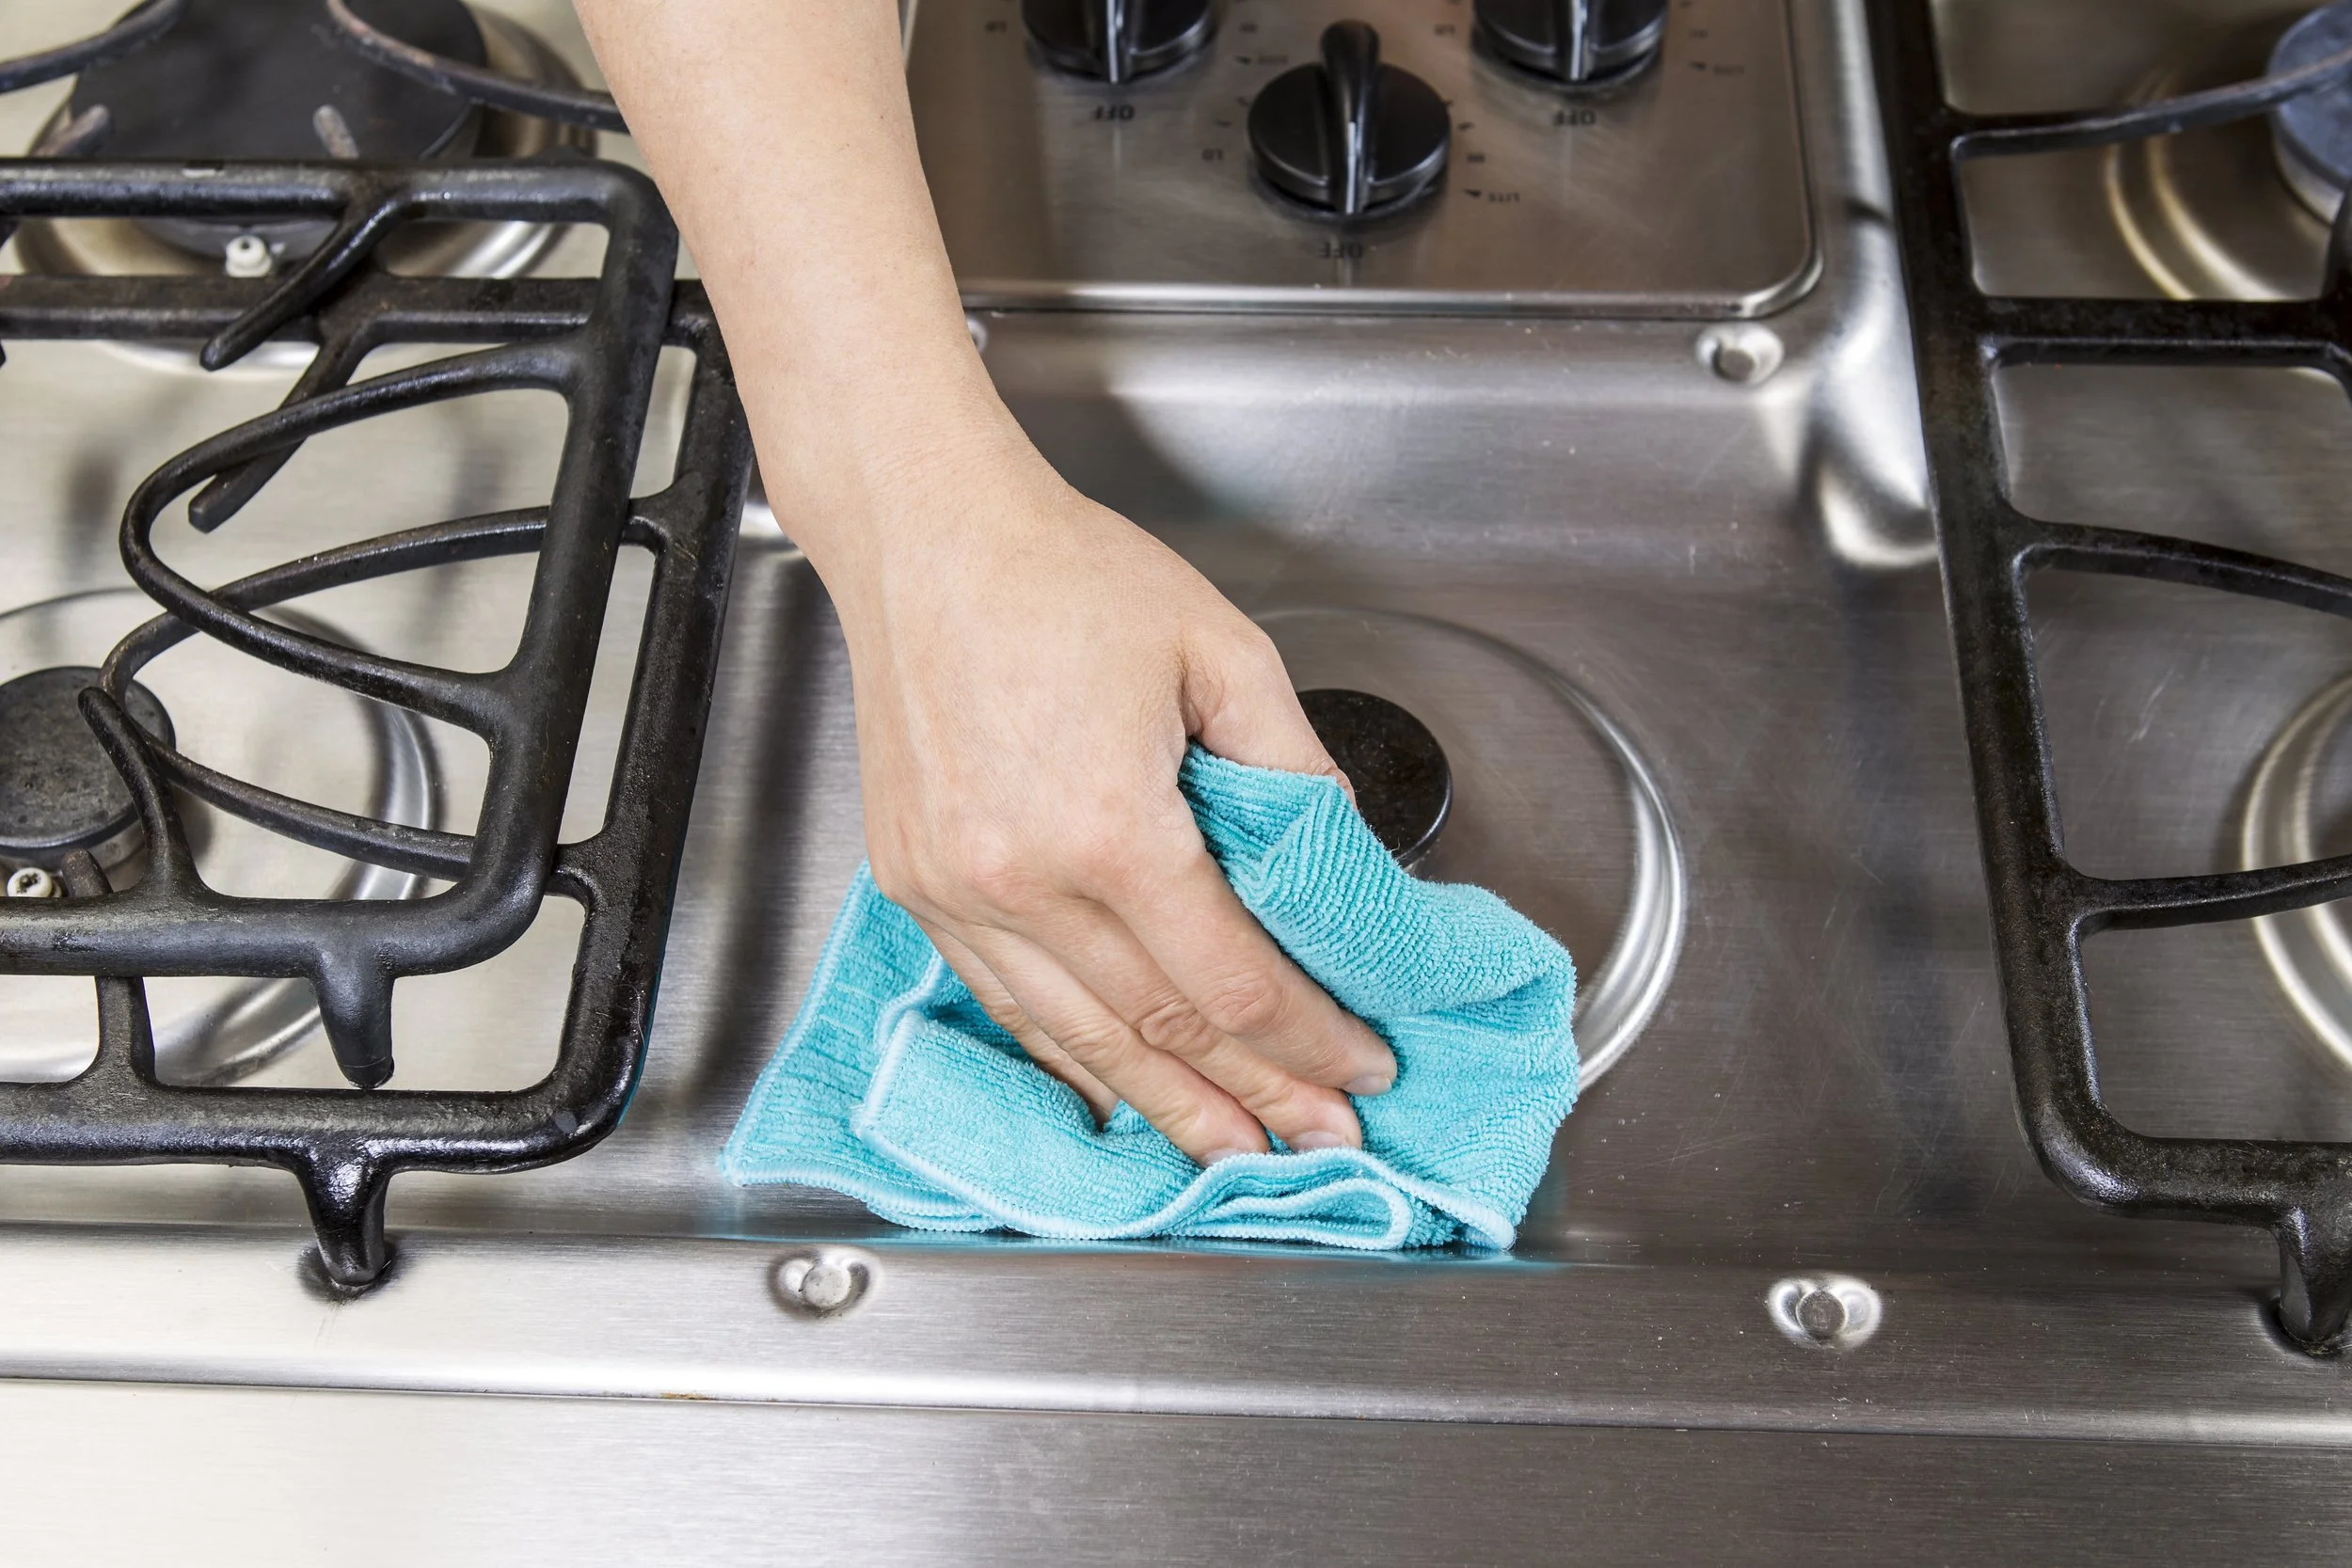
How To Clean A Stove Top
Clean Kingdom - How To Clean A Stove Top

A stove top is an essential kitchen appliance that is used on a daily basis. As such, it is important to keep it clean and well-maintained to ensure that it functions properly and looks good. In this blog, we will discuss the steps for properly cleaning a stove top.
Step 1: Turn off the stove and let it cool down
Before you begin cleaning your stove top, make sure that it has been turned off and has completely cooled down. This will help to prevent any accidents or injuries while cleaning.
Step 2: Remove the grates and burners
Once the stove top has cooled down, you can remove the grates and burners. These can be washed separately in warm soapy water, rinsed, and dried thoroughly.
Step 3: Clean the surface of the stove top
Next, you can clean the surface of the stove top. Use a soft cloth or sponge and a gentle cleaner to wipe down the surface. Avoid using abrasive cleaners or scrubbers as they can scratch the surface of the stove top.
Step 4: Remove any stubborn stains
If there are any stubborn stains on the stove top, you can use a specialized cleaner designed for stove tops. Apply the cleaner to the stain and let it sit for a few minutes. Then, use a soft cloth or sponge to gently scrub the stain away.
Step 5: Wipe down the stove top
Once you have cleaned the stove top, use a clean, damp cloth to wipe away any remaining cleaner or residue. Then, use a dry cloth to dry the surface completely.
Step 6: Reassemble the stove top
Once the stove top is completely dry, you can reassemble it by placing the burners and grates back in their proper positions.
In conclusion, cleaning a stove top is a simple task that can be done with a few basic supplies and a little bit of elbow grease. By following these steps, you can keep your stove top looking and functioning like new for years to come.
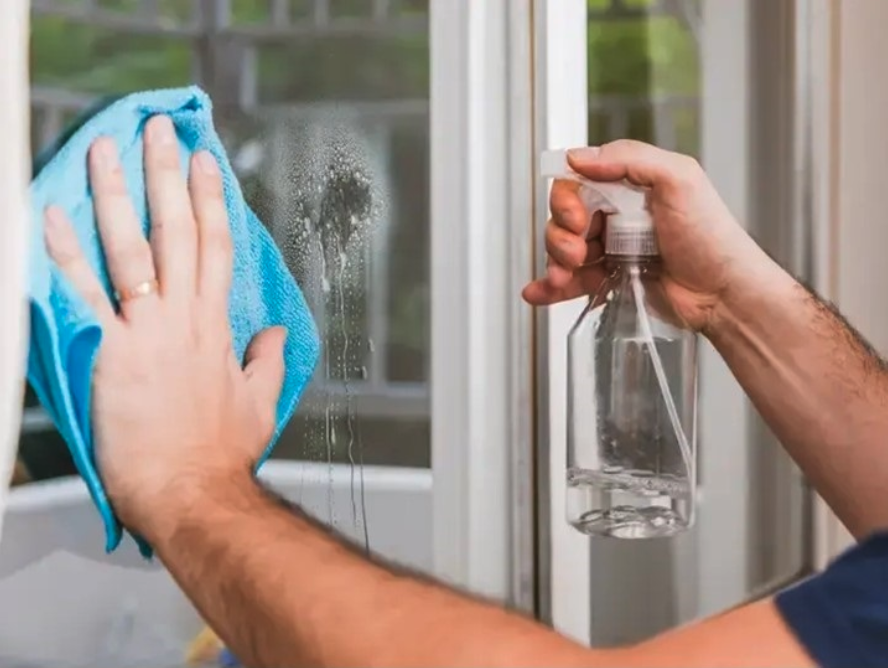
How To Clean The Inside Of The Windows
Clean Kingdom - How To Clean The Windows

Cleaning the inside of windows can be a daunting task, especially if you have large windows or hard-to-reach areas. However, with the right tools and techniques, you can achieve sparkling clean windows in no time. In this blog, we will discuss some tips and tricks on how to clean the inside of windows effectively.
1. Gather your cleaning supplies
The first step in cleaning the inside of windows is to gather all the necessary cleaning supplies. You will need a bucket of warm water, a squeegee, a lint-free cloth, a microfiber cloth, a cleaning solution, and a ladder (if necessary).
2. Remove any dust or debris
Before you start cleaning, remove any dust or debris from the windows. You can use a soft-bristled brush or a vacuum cleaner with a soft brush attachment to remove any loose dirt or dust.
3. Prepare the cleaning solution
There are many cleaning solutions available in the market, but you can also make your own solution using ingredients that you probably already have at home. To prepare your own cleaning solution, mix equal parts of water and white vinegar in a spray bottle. You can also add a few drops of dish soap for extra cleaning power.
4. Apply the cleaning solution
Spray the cleaning solution on the window and use a lint-free cloth to wipe the window clean. Start from the top and work your way down to avoid streaking. Be sure to clean the edges and corners of the window as well.
5. Use a squeegee
After applying the cleaning solution, use a squeegee to remove the excess water and cleaning solution. Start at the top of the window and pull the squeegee down in a straight line, wiping the blade clean after each pass. Be sure to overlap each stroke slightly to avoid leaving streaks.
6. Dry the window
Once you have used the squeegee, use a microfiber cloth or a lint-free cloth to dry the window. Wipe any remaining water or cleaning solution from the edges and corners of the window.
7. Clean any stubborn spots
If there are any stubborn spots or stains on the window, you can use a scraper or a razor blade to remove them. Be sure to use a new blade and work carefully to avoid scratching the window.
In conclusion, cleaning the inside of windows can be a straightforward task if you have the right tools and techniques. By following these steps, you can achieve sparkling clean windows in no time. Remember to be patient and take your time, and your windows will look their best!

How To Clean The Inside Of The Refrigerator
Clean Kingdom - How To Clean The Inside Of The Refrigerator
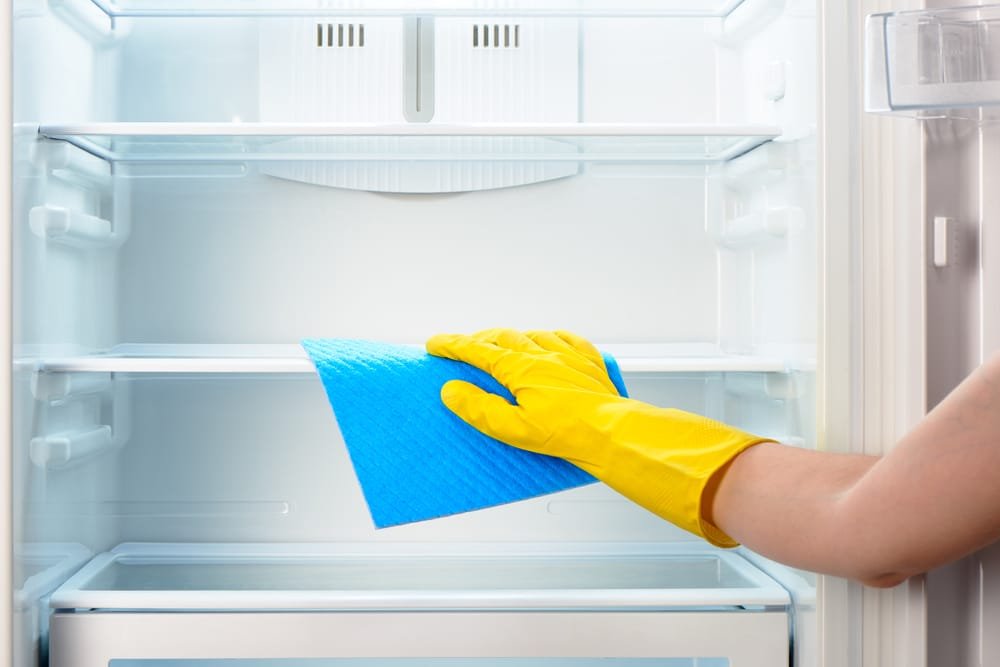
The refrigerator is one of the most important appliances in our homes, keeping our food fresh and safe to eat. However, like any appliance, it can accumulate dirt, grime, and unwanted odors over time. Cleaning the inside of your refrigerator regularly is important for maintaining its efficiency and keeping your food safe. Here's how to clean the inside of your refrigerator:
1. Empty the refrigerator
The first step in cleaning your refrigerator is to empty it completely. Remove all the food and drinks from the shelves, drawers, and door compartments. Discard any spoiled or expired items, and set aside any items that need to be kept cold while you clean.
2. Remove shelves and drawers
Next, remove all the shelves, drawers, and other removable parts from the refrigerator. This will make it easier to clean the inside of the fridge thoroughly. If the shelves and drawers are dirty, wash them in warm, soapy water and dry them before putting them back in the fridge.
3. Clean the inside of the refrigerator
Now it's time to clean the inside of the fridge. Use a sponge or cloth and a solution of warm water and mild dish soap to wipe down the walls, shelves, and drawers. For tough stains or spills, you can use a baking soda paste (mix baking soda and water until it forms a paste) or a vinegar and water solution. Avoid using abrasive cleaners or scrubbers that could damage the interior of the fridge.
4. Clean the door gasket and seals
The door gasket and seals are important for keeping the cold air inside the fridge. Over time, they can accumulate dirt and grime that can affect their performance. Use a clean, damp cloth to wipe down the gasket and seals, making sure to get into any crevices or folds. If the gasket is damaged or worn, it may need to be replaced.
5. Clean the exterior of the fridge
Once you've finished cleaning the inside of the fridge, it's time to clean the exterior. Use a clean, damp cloth to wipe down the doors, handles, and any other surfaces. If the exterior is stainless steel, use a cleaner specifically designed for stainless steel to avoid scratching or damaging the surface.
6. Put everything back
Once the inside and outside of the fridge are clean and dry, it's time to put everything back. Make sure to organize the food and drinks in a way that makes sense for your household, and check the temperature settings to make sure the fridge is at the right temperature.
In conclusion, cleaning the inside of your refrigerator is an important task that should be done regularly to maintain its efficiency and keep your food safe. By following these steps, you can keep your fridge clean, fresh, and working properly.
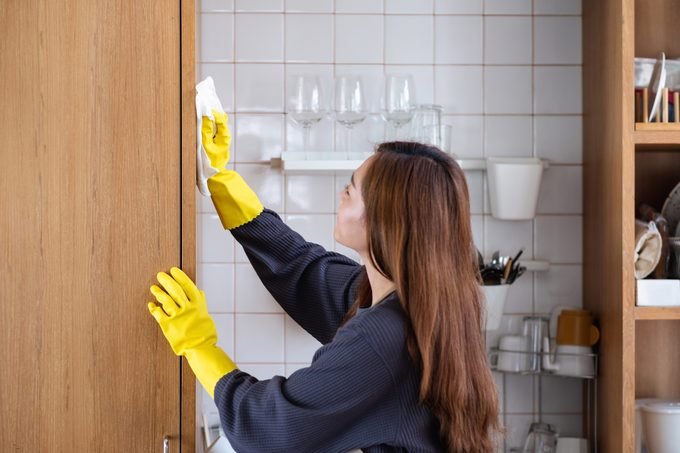
How To Clean The Cabinets
Clean Kingdom - How To Clean The Cabinets

Cleaning the cabinets in your home is an important task that can help keep your living space looking great and free from dirt and grime buildup. Whether you have wood cabinets in your kitchen or bathroom, or laminated cabinets in your bedroom, it's essential to regularly clean them to maintain their appearance and prevent damage.
Here are some tips to help you clean your cabinets effectively:
1. Remove Everything from the Cabinets
Before you begin cleaning your cabinets, it's essential to remove everything from them. This way, you can clean the inside shelves and drawers and ensure that you don't miss any food crumbs or spills.
2. Use a Soft Cloth or Sponge
When cleaning the exterior of your cabinets, use a soft cloth or sponge. Avoid using abrasive scrubbers that can scratch the surface of your cabinets. You can use a microfiber cloth, which is gentle on the surface and leaves no scratches.
3. Choose the Right Cleaning Product
The type of cleaning product you choose will depend on the material of your cabinets. For wood cabinets, you can use a wood cleaner or a solution of warm water and mild soap. For laminate or painted cabinets, a general-purpose cleaner or a solution of warm water and vinegar can do the trick.
4. Clean the Inside of the Cabinets
While cleaning the exterior of your cabinets is important, don't forget about the inside. Use a vacuum cleaner with an upholstery attachment to remove dust and debris from the shelves and corners. Then wipe the surfaces with a damp cloth or a cleaner of your choice.
5. Pay Attention to Detail
When cleaning your cabinets, pay attention to details like the edges, corners, and handles. These areas can accumulate dirt and grime over time, so use a toothbrush or a soft-bristled brush to clean them thoroughly.
6. Dry the Cabinets
After cleaning your cabinets, ensure that you dry them thoroughly. Excess moisture can damage the wood or laminate material of your cabinets, so use a clean, dry cloth to wipe them down.
In conclusion, cleaning your cabinets is an essential task that should be done regularly to keep your home looking great. By following these tips, you can ensure that your cabinets remain in good condition and last for many years to come.
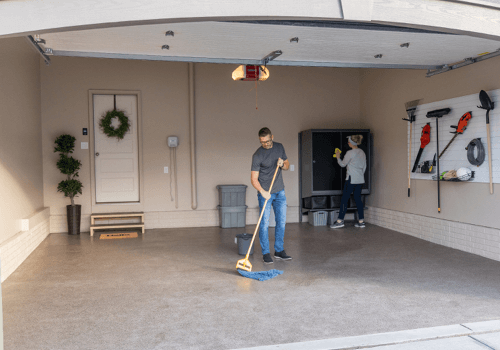
How To Clean The Inside Of The Garage
Clean Kingdom - How To Clean The Garage

A garage is a useful space for storing vehicles, tools, and other household items. However, over time, it can become cluttered and dusty, making it difficult to navigate and use effectively. To make the most of your garage, it's important to keep it clean and organized. In this blog post, we'll guide you through the steps to clean the inside of your garage.
1. Declutter
The first step to cleaning your garage is to declutter. Remove all items from the garage and sort them into piles: keep, donate, sell, or throw away. Be honest with yourself about what you really need and what you can part with. This will make it easier to organize and clean your garage.
2. Sweep and Dust
Once you've decluttered, it's time to sweep and dust the garage. Start by sweeping the floor and removing any debris, leaves, or cobwebs. Use a broom or leaf blower to remove any dust from the walls and ceiling. If the garage has windows, clean them with a glass cleaner.
3. Organize
Organizing your garage is essential for maximizing storage space and making it easier to find things when you need them. Invest in shelves, cabinets, and storage bins to help keep items off the floor and out of the way. Group similar items together for easy access. For example, keep gardening tools in one area and power tools in another.
4. Clean Tools and Equipment
Cleaning your tools and equipment is important to keep them in good working condition. Wipe down your tools with a damp cloth and store them in a designated area. If you have large equipment such as lawn mowers or bicycles, give them a quick wipe down and store them off the ground to avoid rusting.
5. Check for Pests
Garages are a common hiding spot for pests such as mice and spiders. Check for signs of pest infestation such as droppings or webs. If you find any, take steps to eliminate the problem before it gets worse.
6. Maintain
Once you've cleaned and organized your garage, it's important to maintain it. Regularly sweep the floor, wipe down your tools, and organize as needed. This will help keep your garage clean and functional for years to come.
In conclusion, cleaning the inside of your garage is an important task that should not be ignored. By following these steps, you can transform your garage from a cluttered mess to a functional space that you can be proud of. Remember to declutter, sweep and dust, organize, clean tools and equipment, check for pests, and maintain your garage regularly.

How To Clean The Living Room
Clean Kingdom - How To Clean The Living Room
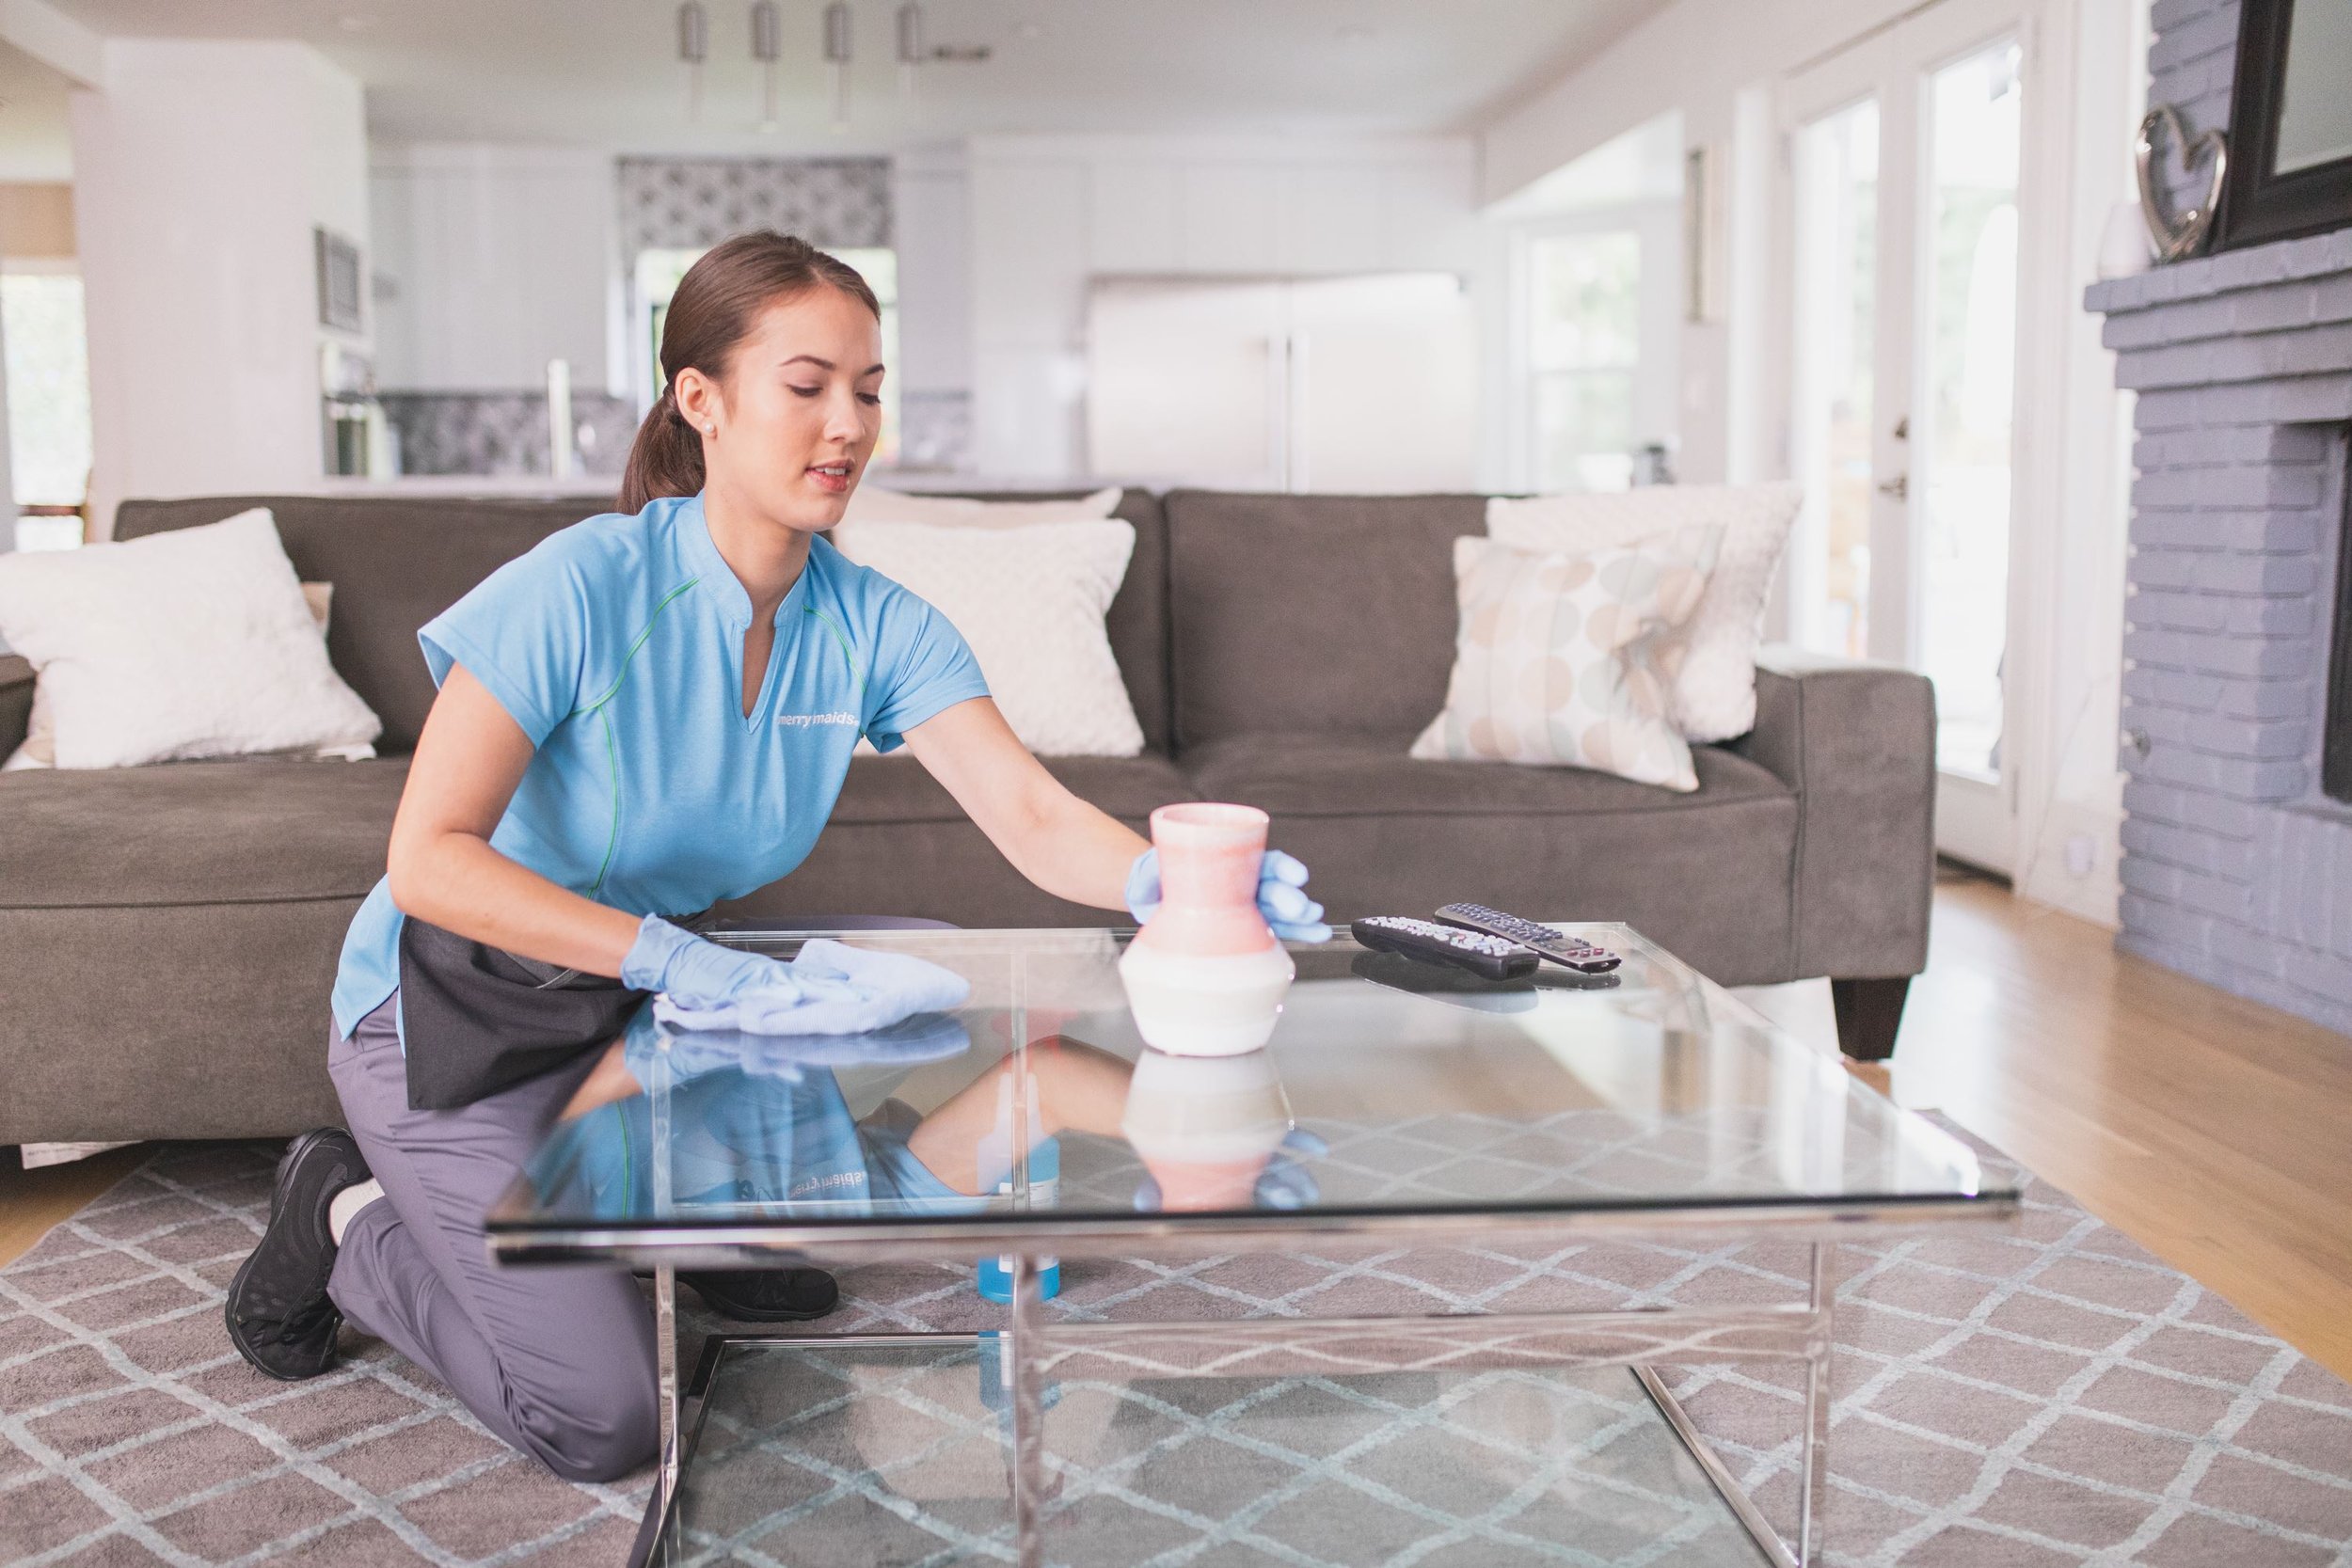
Keeping your living room and family room clean is essential for maintaining a comfortable and inviting home. These are the spaces where you and your family likely spend a lot of time together, so it's important to keep them tidy and organized. Here are some tips on how to clean these rooms effectively:
1. Declutter: The first step in cleaning any room is to declutter. Start by removing any items that don't belong in the living room or family room, such as dishes or laundry. Then, take a look at the remaining items and consider whether they are necessary or if they can be stored elsewhere.
2. Dust: Next, dust all surfaces, including shelves, coffee tables, and electronics. Use a microfiber cloth or duster to avoid spreading dust around the room. Don't forget to dust any decorative items, such as picture frames or figurines.
3. Vacuum: Vacuuming is an important step in cleaning the living room and family room. Start by vacuuming the floors, including under furniture and in corners. Don't forget to vacuum any rugs or carpeted areas. If you have pets, be sure to use a vacuum cleaner with a HEPA filter to help remove pet hair and dander.
4. Clean Furniture: Use a damp cloth to wipe down any furniture in the room. For leather furniture, use a cloth dampened with water and a mild soap to clean the surface. For fabric upholstery, check the care label for any specific instructions. You may need to use a special upholstery cleaner.
5. Clean Electronics: Use a microfiber cloth to wipe down any electronics in the room, such as the TV or sound system. Avoid using harsh chemicals, as they can damage the electronics.
6. Organize: Once everything is clean, take some time to organize the room. Put away any items that are out of place, such as magazines or toys. Consider using storage bins or baskets to keep items organized.
7. Freshen the Air: Finally, freshen the air in the room by opening windows or using an air purifier. You can also add a pleasant scent by using a diffuser with essential oils or lighting a scented candle.
In conclusion, keeping your living room and family room clean doesn't have to be a daunting task. By following these simple steps, you can maintain a tidy and inviting space that you and your family will enjoy spending time in.

How To Clean The Kitchen
Clean Kingdom - How To Clean The Kitchen

A clean kitchen is essential for maintaining good health and hygiene. With all the cooking, eating, and food preparation that goes on in the kitchen, it is important to keep it clean and free from germs and bacteria. In this blog, we will discuss some simple steps that you can follow to clean your kitchen effectively.
Step 1: Clear the Clutter
The first step in cleaning your kitchen is to clear the clutter. Remove any dishes, utensils, and appliances that are lying around on the counters and put them away in their designated spots. This will help you to see what needs to be cleaned and make it easier to access the surfaces that need to be cleaned.
Step 2: Wipe Down Surfaces
Wipe down all the surfaces in your kitchen, including countertops, tables, and chairs. Use a damp cloth or sponge to remove any food crumbs, spills, and stains. For tough stains, you may need to use a mild detergent or cleaning product. Be sure to rinse the surfaces thoroughly with water to remove any residue from the cleaning product.
Step 3: Clean the Appliances
Clean all the appliances in your kitchen, including the refrigerator, stove, oven, and microwave. Use a damp cloth or sponge to wipe down the surfaces of these appliances, and use a cleaning product to remove any stubborn stains or grease. Be sure to clean the inside of the refrigerator and microwave as well.
Step 4: Wash the Dishes
Wash all the dishes that are lying around in the sink. Use hot, soapy water and a scrub brush or sponge to remove any food residue. Rinse the dishes thoroughly with water and dry them with a clean towel or place them in the dishwasher.
Step 5: Sweep and Mop the Floor
Sweep the floor to remove any dirt, debris, and food crumbs. Use a mop and a bucket of hot, soapy water to clean the floor. Be sure to rinse the mop frequently to avoid spreading dirt around the kitchen.
Step 6: Clean the Sink
Clean the sink with a mild detergent or cleaning product. Use a scrub brush or sponge to remove any stains or residue from the sink. Rinse the sink thoroughly with water and dry it with a clean towel.
In conclusion, cleaning your kitchen is an essential task that should be done regularly to maintain good health and hygiene. By following these simple steps, you can keep your kitchen clean and free from germs and bacteria. Remember to clean your kitchen after every meal and to put away dishes and appliances in their designated spots to keep your kitchen clutter-free.

How To Clean The Dishwasher
Clean Kingdom - How To Clean The Dishwasher

Dishwashers are a great invention that helps to save time and effort in cleaning dishes. However, after prolonged use, they can become dirty and develop an unpleasant odor. Cleaning the inside of a dishwasher is an essential task that should be done regularly to maintain its efficiency and longevity. Here are some steps to follow when cleaning the inside of a dishwasher.
1. Remove any debris and food particles
The first step is to remove any food debris and particles that may be stuck in the dishwasher. This can be done by hand or with a damp cloth. Be sure to check the dishwasher's filter and remove any debris that may have accumulated there.
2. Use a dishwasher cleaner
To clean the inside of the dishwasher, you should use a dishwasher cleaner. There are many types of dishwasher cleaners available in the market, and you can choose one that suits your needs. Follow the instructions on the cleaner and apply it to the dishwasher. Some cleaners require you to run the dishwasher on a specific cycle, while others require you to leave the cleaner in the dishwasher overnight.
3. Use vinegar and baking soda
You can also use vinegar and baking soda to clean the inside of the dishwasher. First, sprinkle baking soda on the bottom of the dishwasher. Then, pour a cup of vinegar into a dishwasher-safe cup or bowl and place it on the top rack of the dishwasher. Run the dishwasher on a hot cycle, and the vinegar and baking soda will work to clean and deodorize the dishwasher.
4. Clean the spray arm
The spray arm is responsible for distributing water throughout the dishwasher. Over time, it can become clogged with debris and particles. To clean the spray arm, remove it from the dishwasher and soak it in warm water and vinegar for about 30 minutes. Then, use a toothbrush or a small brush to scrub away any debris that may be stuck on the spray arm.
5. Wipe down the interior
After you have cleaned the dishwasher, use a damp cloth to wipe down the interior. Pay special attention to the door seal, as this area can accumulate dirt and debris. Be sure to dry the interior thoroughly before using the dishwasher again.
In conclusion, cleaning the inside of a dishwasher is a simple task that can be done with a few household items. By following these steps, you can ensure that your dishwasher remains clean and efficient. Regular cleaning will not only keep your dishwasher in good condition but also prevent the growth of bacteria and unpleasant odors.
How To Clean Countertops
Clean Kingdom - How To Clean Countertops

Cleaning counters is an important part of maintaining a clean and healthy home. Counters are some of the most frequently used surfaces in a home, and they can quickly accumulate dirt, grime, and bacteria if not cleaned regularly. In this blog, we will discuss some of the best practices for cleaning counters.
1. Remove clutter and debris: Before you start cleaning your counters, remove any clutter and debris from the surface. This includes dishes, food, appliances, and any other objects that are on the counter.
2. Wipe down the counters: Use a damp cloth or sponge to wipe down the counters, removing any loose dirt or debris. Be sure to wipe the entire surface, including the edges and corners.
3. Use a cleaning solution: Depending on the type of counter you have, you may need to use a specific cleaning solution. For example, granite and marble counters require a pH-neutral cleaner, while laminate counters can be cleaned with a mild soap and water solution. Be sure to read the manufacturer's instructions before using any cleaning product on your counters.
4. Scrub the counters: If your counters are particularly dirty or stained, you may need to use a scrub brush or sponge to remove the grime. Use a circular motion and apply gentle pressure to avoid scratching the surface.
5. Rinse and dry: Once you have finished scrubbing the counters, rinse them thoroughly with clean water. Use a dry cloth or towel to dry the surface, removing any excess moisture.
6. Apply a sealant (optional): If you have granite or marble counters, you may want to apply a sealant to protect the surface from stains and damage. Follow the manufacturer's instructions for applying the sealant, and be sure to reapply it as needed.
In addition to these steps, there are a few other things you can do to keep your counters clean and in good condition. For example, avoid placing hot pots and pans directly on the surface, as this can cause damage. Use cutting boards to protect the counter from scratches and knife marks. And be sure to clean up spills and stains as soon as they occur, to prevent them from setting in.
In conclusion, cleaning counters is an important part of keeping your home clean and healthy. By following these tips and best practices, you can ensure that your counters stay in good condition and free from dirt and bacteria.

How To Clean The Microwave
Clean Kingdom - How To Clean A Microwave

Microwaves are a convenient and essential appliance in most households. They help us heat food quickly and easily, but over time, they can accumulate food splatters and stains, making them look and smell unpleasant. Cleaning your microwave regularly not only keeps it looking good but also ensures that it continues to function at its best. In this blog, we will provide you with some tips on how to clean your microwave effectively.
1. Gather the necessary supplies:
Before starting, it is essential to gather all the necessary supplies. You will need a bowl of water, white vinegar, a sponge or a soft cloth, and a toothpick or a wooden skewer.
2. Remove any loose debris:
Before cleaning, remove any loose debris or food particles from the microwave. Wipe down the interior with a dry cloth or paper towel to remove any loose debris.
3. Prepare the cleaning solution:
In a microwave-safe bowl, mix one cup of water and one tablespoon of white vinegar. Place the bowl in the microwave and heat it on high for five minutes. This solution will help loosen any food particles and stains, making them easier to wipe away.
4. Let the solution sit for a few minutes:
After heating the solution, let it sit in the microwave for a few minutes to allow the steam to loosen any stains or food particles.
5. Wipe down the interior:
Using a soft cloth or a sponge, wipe down the interior of the microwave, paying special attention to any stubborn stains. For hard-to-reach areas, use a toothpick or a wooden skewer to remove any debris or food particles.
6. Clean the exterior:
Don't forget to wipe down the exterior of the microwave, including the door, control panel, and vents. Use a damp cloth to wipe away any dirt or stains, and dry it with a clean cloth.
7. Clean the turntable:
Remove the turntable and wash it in warm, soapy water. Rinse it thoroughly and dry it before placing it back in the microwave.
8. Deodorize the microwave:
To remove any lingering odors, place a bowl of baking soda or a few slices of lemon in the microwave and heat it on high for a few minutes.
In conclusion, cleaning your microwave is a straightforward and essential task that can help prolong its lifespan and keep it functioning efficiently. By following these simple steps, you can ensure that your microwave remains sparkling clean and odor-free.

How To Clean The Bedroom
Clean Kingdom - How To Clean The Bedroom
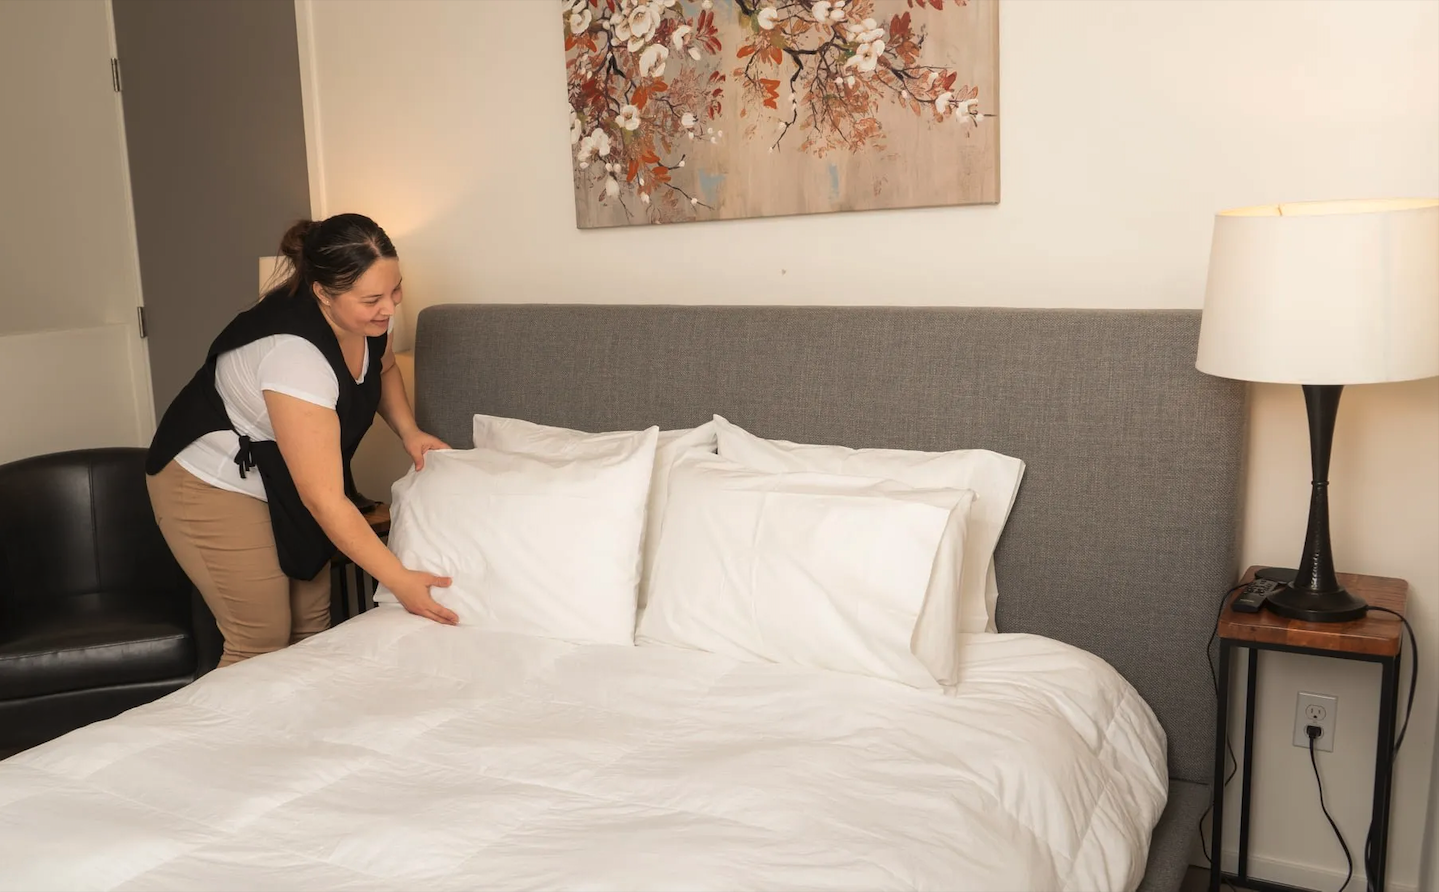
A clean and tidy bedroom is essential for a good night's sleep and a refreshing start to the day. However, cleaning the bedroom can sometimes feel like a daunting task, especially if it has been neglected for a while. In this blog, we will provide you with some tips on how to clean your bedroom efficiently and effectively.
1. Declutter
The first step in cleaning your bedroom is decluttering. Start by removing any items that don't belong in the bedroom, such as dishes, books, or clothes. Then, take a look around your room and identify any items that you no longer need or use. Consider donating or selling these items to free up space in your room.
2. Dust and Vacuum
Dust and dirt can accumulate quickly in a bedroom, so it's important to dust and vacuum regularly. Start by dusting all surfaces, including furniture, shelves, and picture frames. Use a microfiber cloth or a duster to remove the dust. Then, vacuum the floors, paying special attention to areas under the bed and furniture. If you have carpet, consider using a carpet cleaner to deep clean it.
3. Clean the Bedding
Next, it's time to clean the bedding. Strip the bed of all linens, including the sheets, pillowcases, and comforter. Wash these items in hot water and detergent, and dry them on high heat. While the bedding is washing, take some time to vacuum and flip your mattress to keep it clean and fresh.
4. Clean the Windows and Mirrors
Windows and mirrors can quickly become smudged and dirty, so it's important to clean them regularly. Use a glass cleaner and a microfiber cloth to clean the windows and mirrors in your bedroom. Make sure to remove any streaks or smudges for a crystal-clear finish.
5. Organize the Closet
A cluttered closet can make it difficult to find what you need, so take some time to organize it. Start by removing all items from the closet and sorting them into piles. Consider donating or selling any items that you no longer need or use. Then, organize the remaining items by category, such as shirts, pants, and dresses. Use hangers, shelves, and storage bins to keep everything neat and organized.
In conclusion, cleaning your bedroom doesn't have to be a daunting task. By following these tips, you can efficiently and effectively clean your bedroom, leaving you with a clean and tidy space to relax and recharge. Remember to declutter, dust and vacuum, clean the bedding, clean the windows and mirrors, and organize the closet for the best results.

How To Clean The Floors
Clean Kingdom - How To Clean The Floors

Keeping your floors clean and tidy is an essential part of maintaining a healthy and hygienic home. Dirty floors not only look unsightly but can also harbor germs and bacteria that can be harmful to your health. In this blog, we will provide you with some tips on how to clean different types of floors.
1. Hardwood Floors
Hardwood floors are beautiful and add a touch of elegance to any home. However, they require a little extra care when it comes to cleaning. Here’s how to clean hardwood floors:
- Sweep or vacuum the floor to remove loose dirt and debris.
- Use a damp mop with a hardwood floor cleaner to clean the floor. Avoid using too much water as excess water can cause damage to the wood.
- Wipe up spills immediately to prevent water damage.
- Use area rugs or mats in high-traffic areas to protect the floor from scratches and wear.
2. Tile Floors
Tile floors are durable and easy to clean. Here’s how to clean tile floors:
- Sweep or vacuum the floor to remove loose dirt and debris.
- Mix a solution of warm water and a mild detergent.
- Use a damp mop to clean the floor. Avoid using abrasive cleaners as they can scratch the surface of the tile.
- Rinse the floor with clean water to remove any residue from the detergent.
- Dry the floor with a clean towel or allow it to air dry.
3. Carpet Floors
Carpet floors are cozy and comfortable but require regular cleaning to keep them looking and smelling fresh. Here’s how to clean carpet floors:
- Vacuum the carpet regularly to remove loose dirt and debris.
- Treat stains promptly using a carpet stain remover.
- Deep clean the carpet using a carpet cleaner or hire a professional carpet cleaning service.
- Allow the carpet to dry completely before walking on it.
4. Vinyl Floors
Vinyl floors are easy to clean and maintain. Here’s how to clean vinyl floors:
- Sweep or vacuum the floor to remove loose dirt and debris.
- Mix a solution of warm water and a mild detergent.
- Use a damp mop to clean the floor. Avoid using abrasive cleaners as they can scratch the surface of the vinyl.
- Rinse the floor with clean water to remove any residue from the detergent.
- Dry the floor with a clean towel or allow it to air dry.
In conclusion, keeping your floors clean is essential for maintaining a healthy and hygienic home. By following these simple tips, you can keep your floors looking clean and tidy and extend their lifespan.
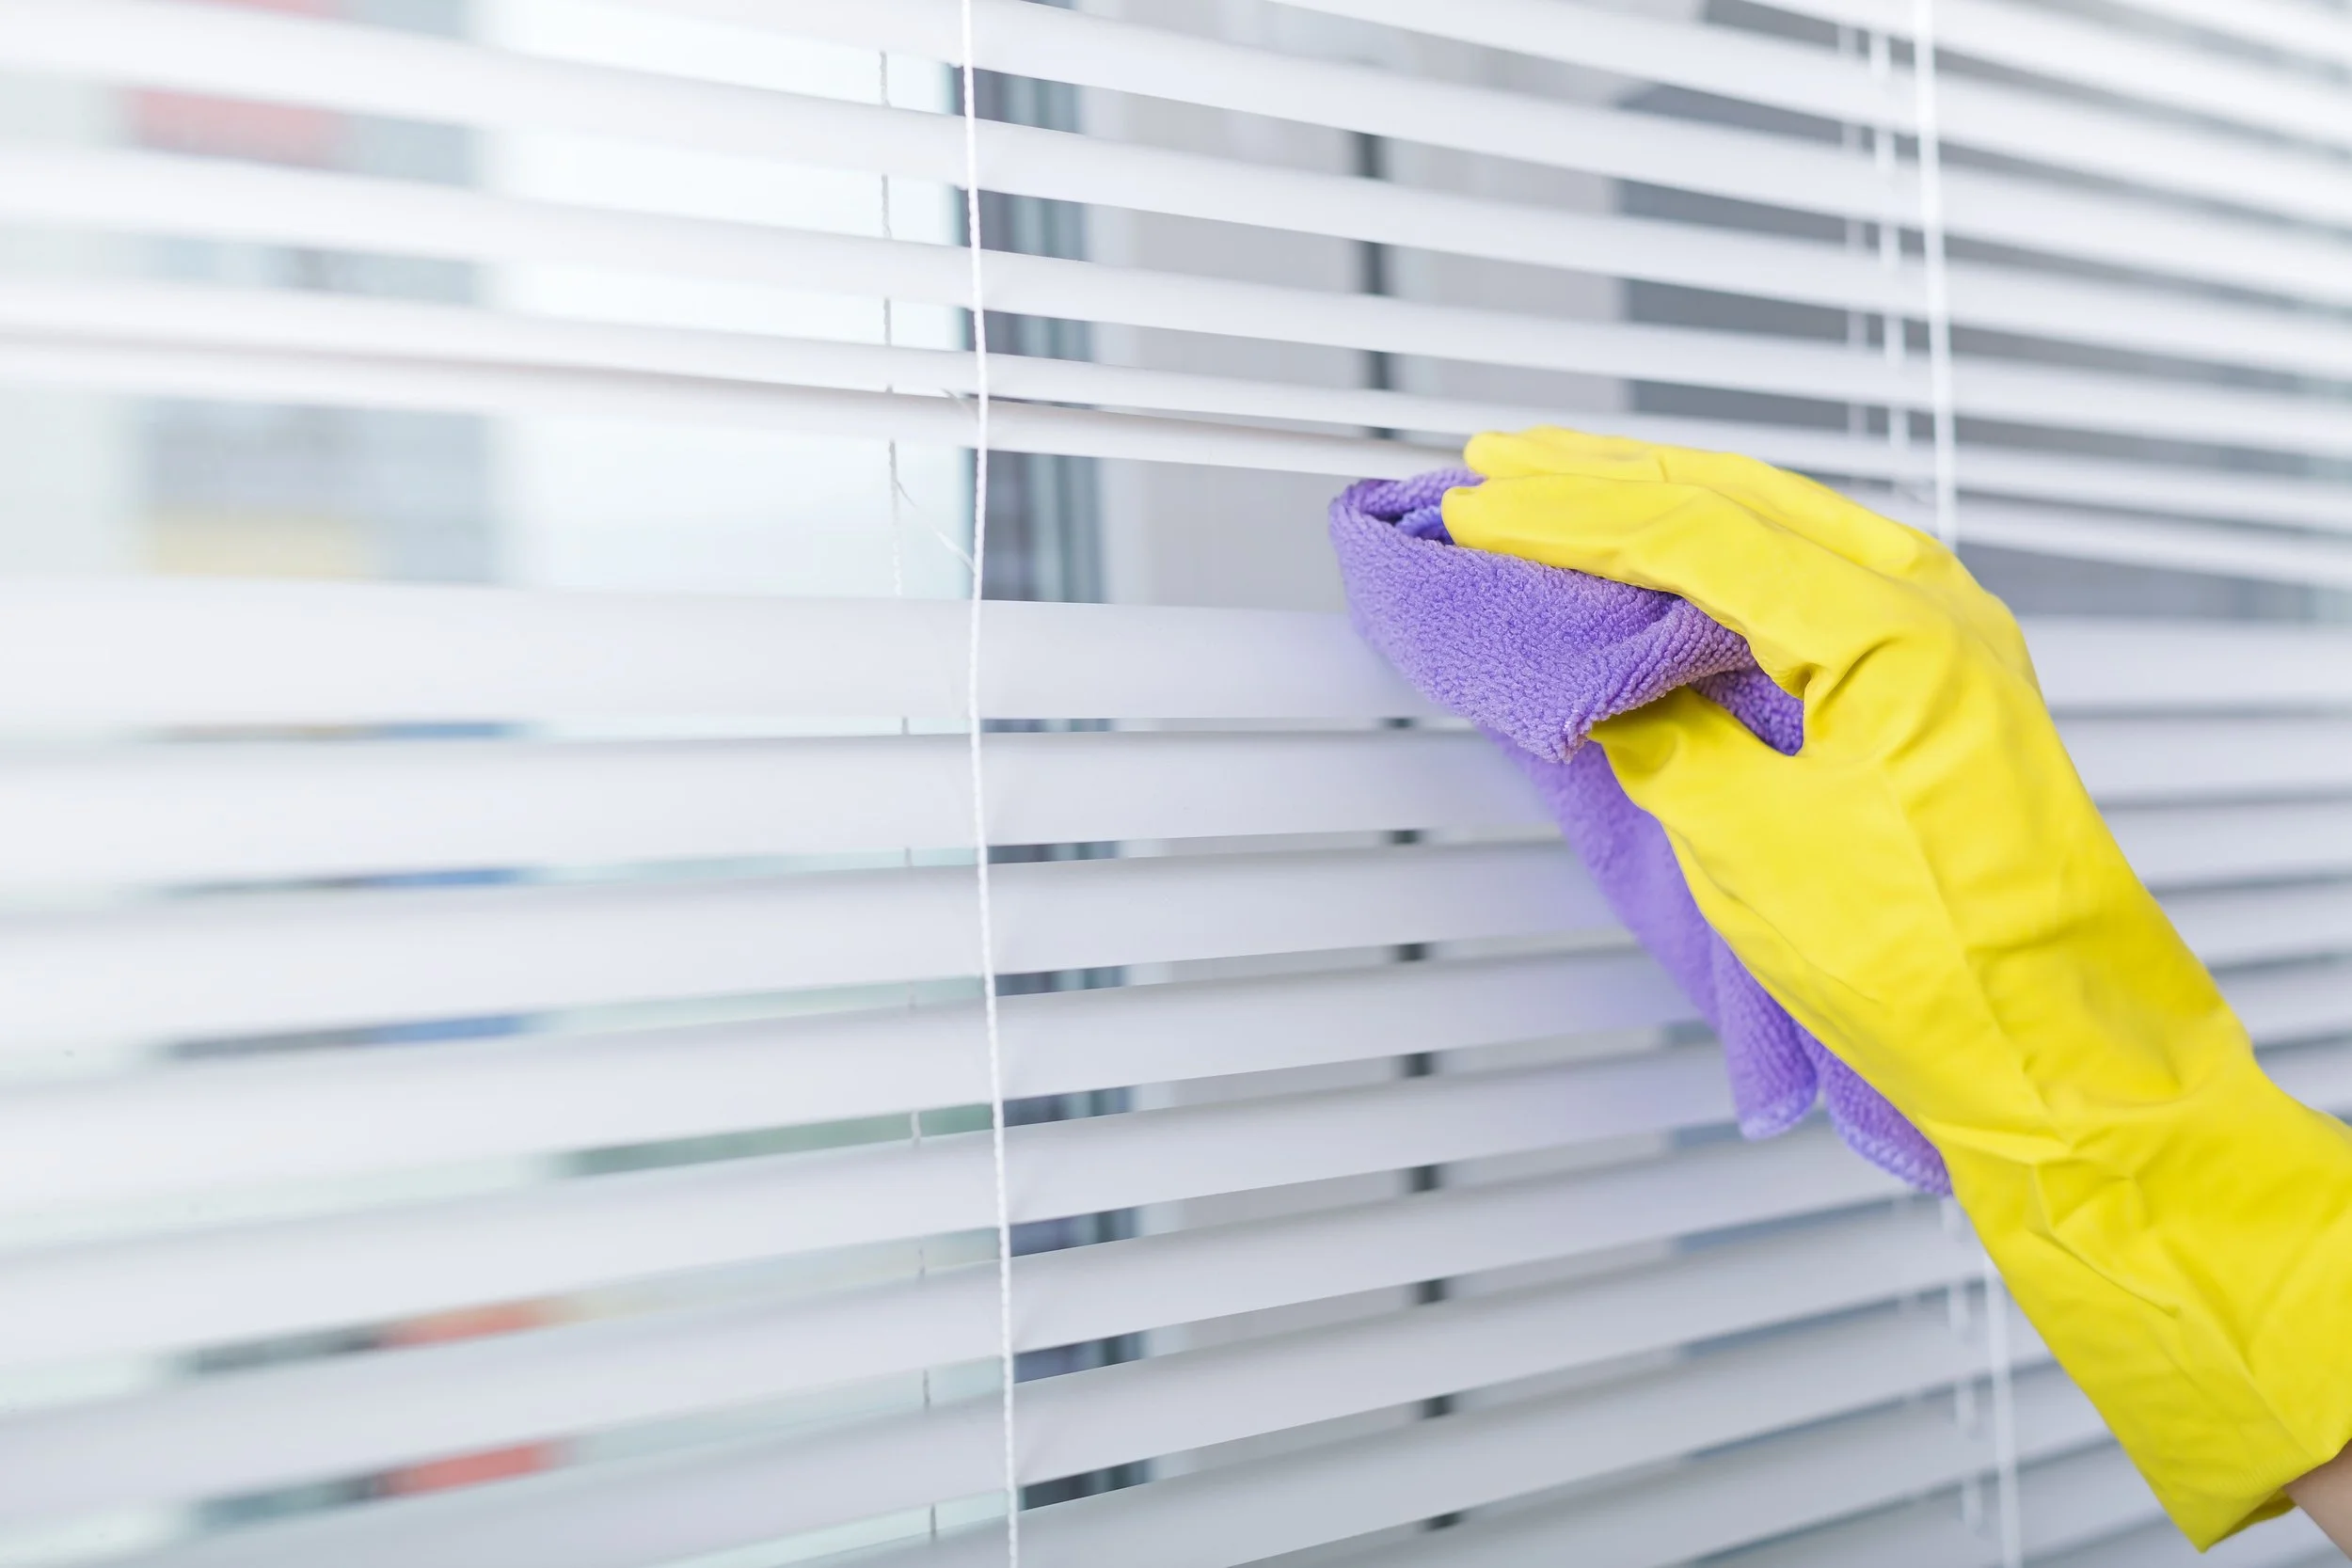
How To Clean The Blinds
Clean Kingdom - How To Clean The Blinds

Blinds are a popular window treatment that can add both style and function to any room. They come in a variety of materials, such as wood, aluminum, and fabric, and are available in different styles, including vertical and horizontal. However, like any other window treatment, blinds can accumulate dust, dirt, and grime over time, making them look dull and unattractive. In this blog, we will discuss how to clean blinds effectively and efficiently.
1. Determine the Type of Blinds You Have
Before you start cleaning your blinds, it's essential to identify the type of blinds you have. Different types of blinds require different cleaning methods and techniques. For example, wooden blinds should not be cleaned with water, while fabric blinds require a gentle touch to avoid damage.
2. Dust Your Blinds Regularly
One of the easiest ways to keep your blinds clean is by dusting them regularly. Use a soft, clean cloth or a feather duster to remove any dust and dirt buildup. You can also use a vacuum cleaner with a brush attachment to remove dust from hard-to-reach areas.
3. Clean Your Blinds with Vinegar and Water
For a more thorough cleaning, mix equal parts of white vinegar and water in a bowl. Dip a clean cloth into the mixture, wring it out, and wipe each slat of your blinds, starting from the top and working your way down. For heavily soiled blinds, you can add a few drops of dish soap to the mixture.
4. Use a Commercial Blind Cleaner
If you don't have vinegar on hand, you can use a commercial blind cleaner. These cleaners are specially formulated to remove dirt and grime from blinds without damaging them. Spray the cleaner directly onto the blinds and wipe them with a clean cloth.
5. Clean Fabric Blinds with a Lint Roller
To clean fabric blinds, use a lint roller or a soft-bristled brush to remove any dust or dirt buildup. If your fabric blinds are heavily soiled, you can spot clean them with a mild detergent and water solution.
6. Dry Your Blinds Thoroughly
After cleaning your blinds, it's essential to dry them thoroughly to prevent water damage or warping. Use a clean, dry cloth to wipe each slat of your blinds and allow them to air dry completely before raising them.
In conclusion, cleaning your blinds is not a difficult task, but it is essential to do it regularly to maintain their appearance and function. By following the tips discussed above, you can keep your blinds looking clean, fresh, and attractive for years to come.

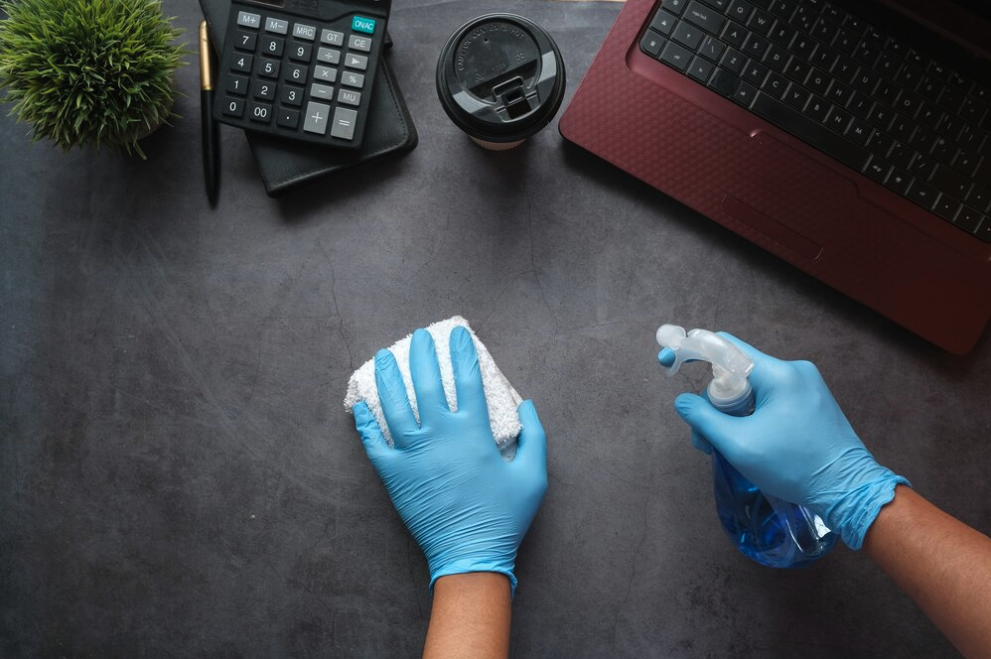
How To Clean Electronics
Clean Kingdom - How To Clean Electronics

Electronics have become an essential part of our daily lives. From smartphones to laptops, we rely on these devices for almost everything. However, with frequent use comes the need for maintenance and cleaning. Keeping your electronics clean not only ensures their longevity but also prevents the spread of germs and bacteria. In this blog, we'll discuss some tips and tricks on how to clean electronics safely and effectively.
1. Unplug your devices: Before you begin cleaning any electronic device, make sure to turn it off and unplug it from the power source. This is important for your safety and to avoid any damage to the device.
2. Use the right tools: Using the wrong cleaning tools can damage your electronics. Avoid using abrasive materials like paper towels, rough cloths, or tissues. Instead, use a microfiber cloth or a soft-bristled brush to remove dust and dirt. If your device is particularly dirty, use a cleaning solution specifically designed for electronics.
3. Clean the exterior: Start by wiping down the exterior of your device with a dry microfiber cloth to remove any dust or dirt. If there are any tough stains or smudges, use a damp cloth with a mild cleaning solution. Avoid getting any moisture near the ports or openings of your device.
4. Clean the screen: The screen is the most sensitive part of your device. You should use a microfiber cloth or a screen-cleaning solution to clean it. Avoid using any harsh chemicals or abrasive materials that can scratch or damage the screen.
5. Clean the keyboard: For laptops and computer keyboards, use a soft-bristled brush to remove any dust or debris between the keys. You can also use a can of compressed air to blow out any dirt or dust particles. If there are any stains or spills, use a damp cloth with a mild cleaning solution.
6. Proper storage: After cleaning your electronics, make sure to store them properly. Keep them in a cool and dry place, away from direct sunlight or heat sources. You can also use a protective case or cover to prevent any scratches or damage.
In conclusion, cleaning your electronics is essential for their longevity and performance. By following these simple tips, you can safely and effectively clean your devices without damaging them. Remember to always use the right tools and cleaning solutions, and avoid getting any moisture near the ports or openings of your device.
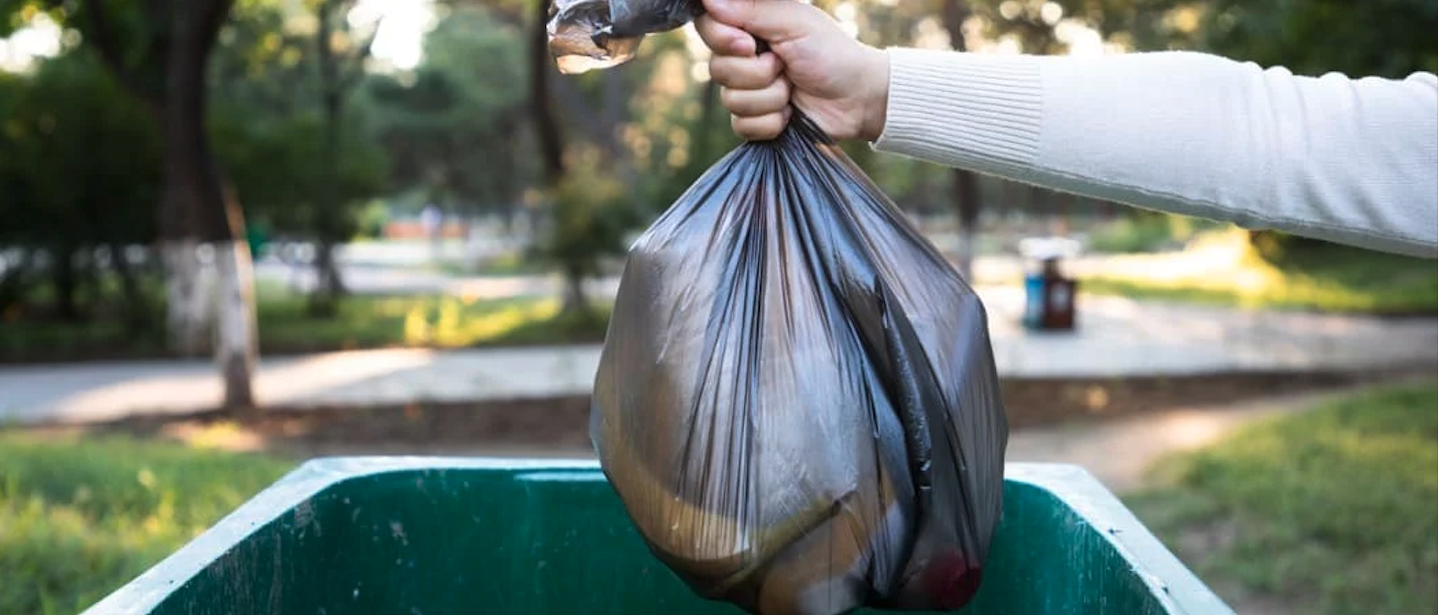
How To Take Out The Trash And Recycling
Clean Kingdom - How To Take Out The Trash And Recycling

Taking out the trash and recycling is a necessary chore that everyone has to do. Properly disposing of waste is not only important for keeping our homes clean and organized, but it also helps to keep our environment healthy. In this blog, we will discuss some tips for taking out the trash and recycling in a safe and efficient manner.
1. Create a Routine
One of the best ways to make sure that you regularly take out the trash and recycling is to create a routine. Choose a specific day of the week that works best for you to take out the trash and recycling. This will help you to remember when it’s time to take out the trash and recycling and make it a habit.
2. Separate Your Trash and Recycling
It's important to separate your trash and recycling into different containers. This will help you to more easily identify what needs to be taken out each week. Recycling can include cans, bottles, paper, and plastic, while trash can include food waste, packaging, and other items that cannot be recycled.
3. Use Proper Containers
Make sure that you use proper containers for both your trash and recycling. For example, use a trash can with a lid to prevent odors and keep pests away. For recycling, use a bin that is specifically designed for recycling and has separate compartments for paper, plastic, and glass.
4. Check Local Guidelines
Different areas have different guidelines for trash and recycling. Check with your local authorities to find out what items can be recycled and what items need to be disposed of in the trash. Make sure to follow these guidelines to ensure that your waste is properly disposed of.
5. Avoid Overfilling
When you take out the trash and recycling, avoid overfilling the containers. This can cause spills and make it more difficult to dispose of properly. Instead, take out the trash and recycling when they are about three-quarters full.
6. Clean Your Containers
To prevent odors and bacteria from building up in your trash and recycling containers, clean them regularly. Use warm water and soap to clean your containers, and then rinse them thoroughly. You can also use baking soda or vinegar to help eliminate odors.
In conclusion, taking out the trash and recycling is an important part of keeping our homes and environment clean and healthy. By following these tips, you can make this task easier and more efficient. Remember to create a routine, separate your trash and recycling, use proper containers, check local guidelines, avoid overfilling, and clean your containers regularly.

How To Clean The Outside Of The Washer And Dryer
Clean Kingdom - How To Clean The Outside Of The Washer And Dryer
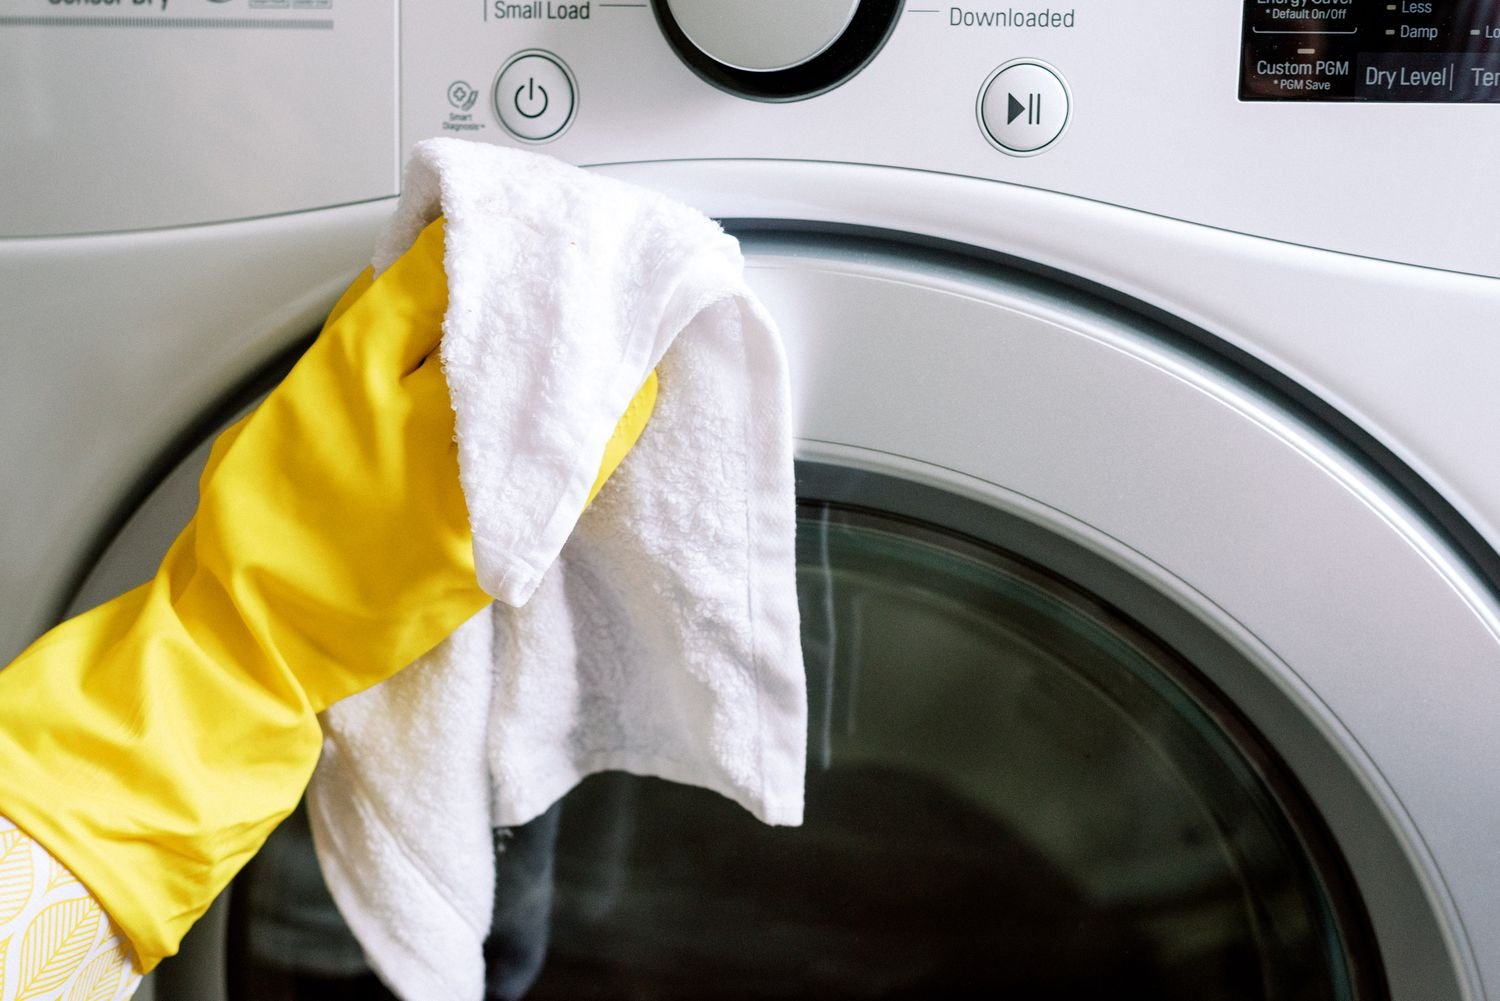
Washers and dryers are essential appliances that help us keep our clothes clean and fresh. However, just like any other household appliance, washers and dryers require regular maintenance and cleaning to keep them in good working condition. In this blog, I will provide you with some tips on how to clean the outside of your washer and dryer.
1. Unplug the appliance
Before you start cleaning the outside of your washer or dryer, make sure that it is unplugged from the power source. This is an important safety precaution that should not be overlooked.
2. Remove any loose dirt and debris
Use a soft-bristled brush or a dry cloth to remove any loose dirt and debris from the outside of the washer or dryer. Pay special attention to the corners and edges of the appliance.
3. Wipe down the surface
Next, use a damp cloth to wipe down the surface of the washer or dryer. You can use a mild detergent or a mixture of water and vinegar to remove any stubborn stains. Avoid using abrasive cleaners or scrubbers that can damage the surface of the appliance.
4. Clean the control panel
The control panel is an important part of the washer or dryer that is prone to getting dirty and greasy. To clean the control panel, use a soft cloth or sponge dipped in a mild detergent solution. Gently scrub the control panel, taking care not to damage any of the buttons or controls.
5. Dry the appliance
After you have finished cleaning the outside of the washer or dryer, use a clean, dry cloth to wipe down the surface. Make sure that there is no moisture left on the appliance, as this can lead to rust or other damage.
6. Polish the surface
If you want your washer or dryer to have a polished and shiny finish, you can use a stainless steel cleaner or a furniture polish to buff the surface. Be sure to follow the instructions on the product label carefully, and avoid using too much product, as this can leave a greasy residue.
In conclusion, cleaning the outside of your washer or dryer is a simple but important task that should be done regularly to keep your appliances in good working condition and looking their best. By following the tips outlined above, you can ensure that your washer and dryer stay clean, shiny, and functional for years to come.

How To Clean a Bathroom
Clean Kingdom - How To Clean A Bathroom

Cleaning a bathroom is not the most glamorous task, but it is an essential one. A clean bathroom not only looks and smells great, but it can also help prevent the spread of germs and bacteria. In this blog, we will provide you with a step-by-step guide on how to clean a bathroom.
Step 1: Gather your cleaning supplies
Before you start cleaning, make sure you have all the necessary cleaning supplies. This may include:
- Rubber gloves
- Cleaning solution (such as a multi-purpose cleaner or bathroom-specific cleaner)
- Scrub brush
- Sponge or cleaning cloth
- Toilet brush
- Glass cleaner
- Mop or cleaning rag
- Trash bags
Step 2: Remove clutter and trash
The first step in cleaning a bathroom is to remove any clutter or trash. This includes emptying the trash can, removing any dirty towels or clothes, and putting away any toiletries or other items that are lying around.
Step 3: Clean the toilet
Next, it's time to tackle the toilet. Start by pouring some cleaning solution into the bowl and letting it sit for a few minutes. Then, use a toilet brush to scrub the inside of the bowl, paying extra attention to the rim and under the rim. Once you're done, flush the toilet and wipe down the outside of the bowl with a cleaning cloth or sponge.
Step 4: Clean the sink and countertops
Next, move on to the sink and countertops. Spray them with cleaning solution and use a sponge or cleaning cloth to wipe them down. Pay attention to any areas that may be particularly dirty, such as around the faucet or any soap scum buildup. Don't forget to clean the mirror with glass cleaner and a cleaning cloth or paper towel.
Step 5: Clean the shower and bathtub
If you have a shower or bathtub, it's important to clean them regularly. Start by spraying the walls and floor with cleaning solution. Use a scrub brush to clean any grout or tile, and use a sponge or cleaning cloth to wipe down the walls and floor. Don't forget to clean the showerhead and faucet with a cleaning cloth or sponge. For a bathtub, fill it with warm water and add some cleaning solution. Let it soak for a few minutes, then drain the water and scrub the tub with a sponge or cleaning cloth.
Step 6: Clean the floors
Finally, it's time to clean the floors. If you have tile or linoleum, use a mop or cleaning rag to clean the floors. If you have carpet, use a vacuum cleaner to remove any dirt or debris.
Step 7: Finish up
Once you've completed all the cleaning tasks, take a step back and admire your work. Dispose of any cleaning supplies and trash bags, and put away any cleaning equipment. Don't forget to wash your hands thoroughly!
In conclusion, cleaning a bathroom may not be the most exciting task, but it is crucial for maintaining a clean and healthy home. By following these steps, you can ensure that your bathroom stays clean and germ-free.